How to set up the course environment
VirtualBox users
System requirements
To use the VIrtualBox image you need
- 64GB free space
- 4GB RAM (16GB recommended, see below)
- Quadcore CPU
Download and import the VirtualBox course image
A VirtualBox image of the course including all data and tools needed can be downloaded from a Blue Mountains Analytics Google Drive here. Download the file biosec_anu.avo and save it to your computer.
Note The VirtualBox image is around 15GB in size, hence a good internet connection is required and it might take some time to download it.
Open the VirtualBox app (not the image you just downloaded but the VirtualBox v6.1 you installed on your computer).
Click on Import Appliance in the middle of the screen

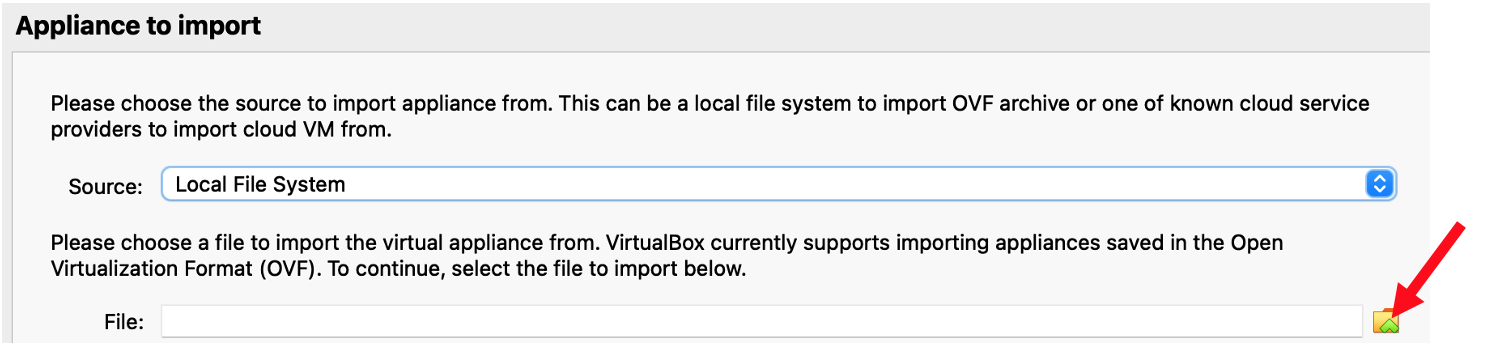
In the new window, click on the little folder in the file section and in the pop-up file browser navigate to the biosec_anu.ova file you just downloaded.
Click Continue and on the next window Import to finish the import process.
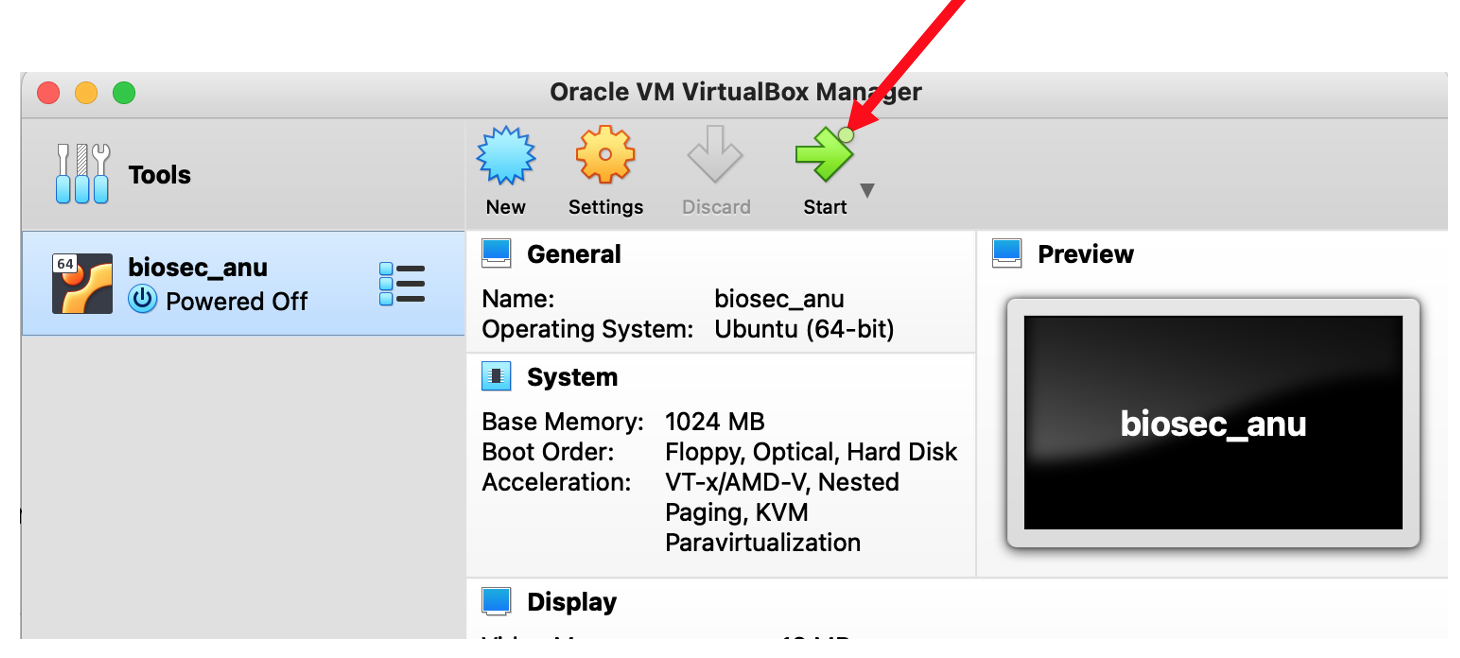
You should now see the new biosec_anu appliance in the menu on the left. Select it (one click on the name) and start it by clicking the big green Start button on the top.
If everything works well you can delete the biosec_anu.avo file from your computer. It is not needed anymore and is only taking up lots of space.
Ubuntu account details
To log in (and unlock the screen)
Login: course_user
Passwd: course_user
Non-VirtualBox users
TO set up the course environment on your local machine without VirtualBox, e.g., on Ubuntu and MACOS (Intel), please download the biosec_course.tar.gz file from the Blue Mountains Analytics Google Drive here.
Note The course uses Conda environments as well as python v3 to install all tools needed. Please see Miniconda installation for COnda installation instructions.
After the download is finished please unpack the tar file in your home directory using
course_user> tar -xzvf biosec_course.tar.gz
Note If the course data is extracted into another directory please adjust all paths in the install files accordingly.
Once that is done change into the directory /biosec_course/misc/install_files and execute the following commands
course_user> conda env create -f environment.yaml
course_user> conda env create -f environment.artic.yaml
course_user> conda env create -f environment.pangolin.yaml
course_user> conda env create -f environment.busco.yaml
course_user> install.sh
course_user> basta.sh
NOTE Course material for the artic and pangolin analyses are not provided on these pages. For information please see the Sars Artic page here.
Your environment should be ready to go.